Root cause analysis is one of the most important problem-solving tools used across the organization. Sometimes planned projects fail, and even entire processes stop producing an expected output and all this negatively affects the overall performance of the organization.
To understand why these problems occurred you need a powerful tool that can help you identify the root causes of such problems. This is where many organization prefers to use the root cause analysis tool that helps the organization or project teams dig deeper and find effective solutions to the business process problem.
In this article, I am going to discuss what is root cause analysis, how to perform it with simple 5 steps, an example of RCA, 5 different tools used in RCA along with one example. In the end, you will be in a position to perform RCA at your workplace to solve any type of problem. So let’s start…
What is root cause analysis?
Root cause analysis is a technique used to understand the real causes behind a problem to identify why a problem occurred in the first place. It helps you dig into the potential root causes of the problem which then allow you to find an appropriate solution for that problem.
In RCA you go into the depth of the problem by collecting data using different tools and then you can create an action plan to prevent all those factors from occurring again which are contributing to the problem.
The easiest way to understand root cause analysis, let’s say your motorbike is suddenly stopped working and you have only 15 minutes to reach the office. In this situation, you could use your friend’s bike or public transport to reach the office on time.
But this solution is temporary and also fails to identify the root causes of the problem i.e. why the bike stops working. The better solution is to call the mechanic (on weekend) and asks them to find out the real causes of why the bike stops working and fix it as well as prevent it from occurring again.
That’s what the RCA is. Its main purpose is to analyze a problem from all sides and identify what actually happened in the process/system, why it happened and what can be done to prevent that problem from happening again.

One drawback of this tool is it comes into action after the problem has occurred so it is basically a reactive approach tool but on the other hand it focuses on the long-term solutions of the problem helping to eliminate the sources of the problem permanently and that makes it an effective problem-solving tool.
RCA is an important problem-solving tool used in Quality improvement. It is one of the most useful tools in Lean Six Sigma process improvement projects.
Basically, in the DMAIC approach, the 3rd phase Analyze is all about analyzing the data and finding causes of problems so in that phase RCA is used to identify the root cause of problems.
RCA is not a single-person approach, it is completely a team-based approach where a team of 5 to 6 members come together and focus on finding the root causes of the problem where they use a lot of different team decision-making techniques.
So that this team-based activity produces good results with the consensus of all team members. Now let’s see the three basic types of causes because of which all the problems happen –
- Physical causes – Any physical items get fail or stop working for whatever reason. Eg- The warning signal light in the inventory department stops working.
- Human causes – One single person or group of team members did something incorrectly at the workplace. In the long term, human error in the workplace will lead to physical causes. Eg- if a team of supervisors did not perform a scheduled maintenance check of the warning signal light which resulted in signal failure.
- Organizational causes – When the system or process that companies use to do their daily tasks and activities is defective. Eg- if the supervisor’s team mistakenly thought that it was the inventory department worker’s responsibility to do a maintenance check of the signal light. Hence nobody will check those signal lights.
So RCA basically looks for these three types of causes. It investigates the patterns of these causes, figures out flaws in the system, and find the specific actions or factors that contributed to the problem.
So with this step-by-step approach, RCA helps the project team identify more than one root cause of the problem. Now let’s understand how to perform RCA step by step.
Relevant content – How to use 8D problem solving to identify root causes?
Get certfied in Lean Six Sigma – EALSS Academy
How to perform Root cause analysis?
RCA is a time taking task but gives you the best result in the end so investing time in RCA is always worth it. Make sure you should involve all the relevant team members in this group activity to get better results like people who are working close to the process or product where the problem has occurred.
The right type of people in the group will help you generate accurate root causes of the problems and gives you the best returns (in terms of root causes) on the time you invested in RCA. Now let’s see simple steps to perform root cause analysis –

1. Define the problem –
The 1st step of Root cause analysis is to identify the problematic situation (process or product) and then analyze that situation to understand what’s happening there, and what are the different factors that are impacting the problematic area.
Gather relevant data and information and create a specific problem statement. Your team should work together in data gathering about the problematic situation and then analyze it properly to frame the right problem statement.
At the end of this step of RCA, you should have the answer to the following question i.e. What’s the problem? What are the specific symptoms? and how does this problem in the process or product affect the end customer requirements?
2. Gather data about the problem –
At this step, you need to analyze the problematic situation completely before you move on to look for factors contributing to the problem. Gather the team members, and experts together to collect relevant data and evaluate all aspects of the problematic situation (process or product).
Your team members must be the people who are directly involved in the problematic process or product that can help you understand the situation in a better way. This step is all about investigating the problem in detail.
Documenting all the relevant information and data about the problem can help you answer the questions like what are contributing factors to the problem? What’s the frequency of repeating the problem? when did the problem occur? etc.
3. Identify all the potential causal factors –
At this step, you need to identify all the potential causes of the problem or factors that are contributing to the problem. You should find out the sequence of events that leads to the problem and the different conditions that allow the problem to occur.
Don’t just stop at one or two causes, dig deeper into each cause and identify as many potential causes as possible. For that, you can use tools like brainstorming and a fishbone diagram.
Brainstorming will help you generate a lot of possible causes of the problem and the fishbone diagram will help you represent the cause-and-effect relationships visually. Make sure you should use this tool as a team activity to identify all the potential causes of the problem.
4. Identify the root causes of the problem –
This step is all about finding the root causes of the problem by asking ‘why’ multiple times to potential causes. At this step, you need to go in more depth about the potential cause to understand why this cause exists, and the real reason behind the problem.
Break down the problem into small, detailed parts to understand it better so that you can easily figure out the major contributing factors to the problem. For this, you can use tools like the fishbone diagram, and 5 why analysis. Pareto chart, Fault tree analysis, Scatter diagram, FMEA, etc.
5. Prioritize the root causes of the problem –
In step 4 you figure out the root causes of the problem then after that, here you need to prioritize the causes as per their impact on the problem. Higher the impact of any cause on the problem, the greater its priority to address.
Prioritization of causes will help you figure out which root causes needs to address first to solve the problem. For prioritization (or ranking cause as per impact on the problem) you can use team decision-making tools like the Nominal group technique, Multi-voting, etc.
6. Recommend and implement a solution –
Once you know the root causes you also prioritize the causes as per their impact on the problem. The last step of root cause analysis is to find out the solution to the problem and create a proper plan for its implementation.
Also, make sure that you can recommend preventive action to ensure that the problem never happens again. You can also plan ahead to predict the effect of the solution on the process or system. You can spot the potential failure mode in the solution before it happens.
For that, you can use the FMEA tool which will help you identify the points where there is the possibility of solution failure.
These are the 6 steps that you can use to perform root cause analysis to solve problems in any industry like manufacturing, service, textile, healthcare, etc.
Make sure to use the respective tools mentioned in the respective steps to get better results at the end of RCA. Check out –Root cause analysis templates complete collection
6 popular root cause analysis tools
The ultimate goal of root cause analysis is to find out the root causes of the problem organize all the causes as per their impact on the problem and then take action to prevent those problems from happening again.
In this entire process of finding the root causes of the problem, RCA uses 6 powerful tools. Let’s have an overview of those tools one by one –
1. Pareto chart –
The Pareto chart is a statistical way of problem-solving used in Six Sigma projects. It is based on the 80/20 principle of Pareto which states that about 80% of the problems in the process are produced by 20% of the few serious potential causes.
The Pareto chart is a bar chart sorted in descending order from the highest frequency to the lowest frequency from left to right. The height of the bar represents the impact of a particular cause on the problem.
In RCA, this tool basically helps the project team members to focus on the areas of improvement which has the highest impact on the problem or you can say help to focus on the root cause which has the highest impact on the problem.

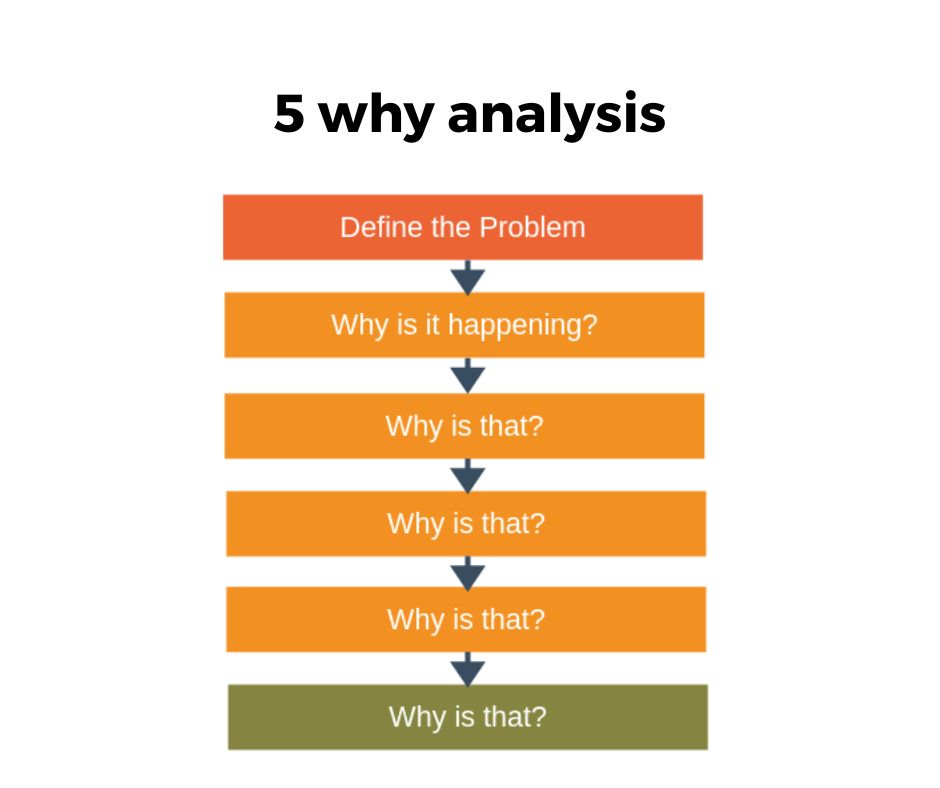
2. 5 why analysis –
5 why analysis is the most popular root cause analysis tool which is generally used in the six sigma project after the project team created a fishbone diagram in the analysis phase.
The idea of this tool is to ask ‘why’ multiple times to the potential causes which are identified using a fishbone diagram to get the exact root cause of the problem.
Ask Why does this happen? to the potential cause and once you get the answer again ask why and follow this until you get into the depth of the cause and figure out the root cause of the problem. This is useful when you don’t have advanced data and you are ready to drill down the potential causes.
3. Scatter diagram –
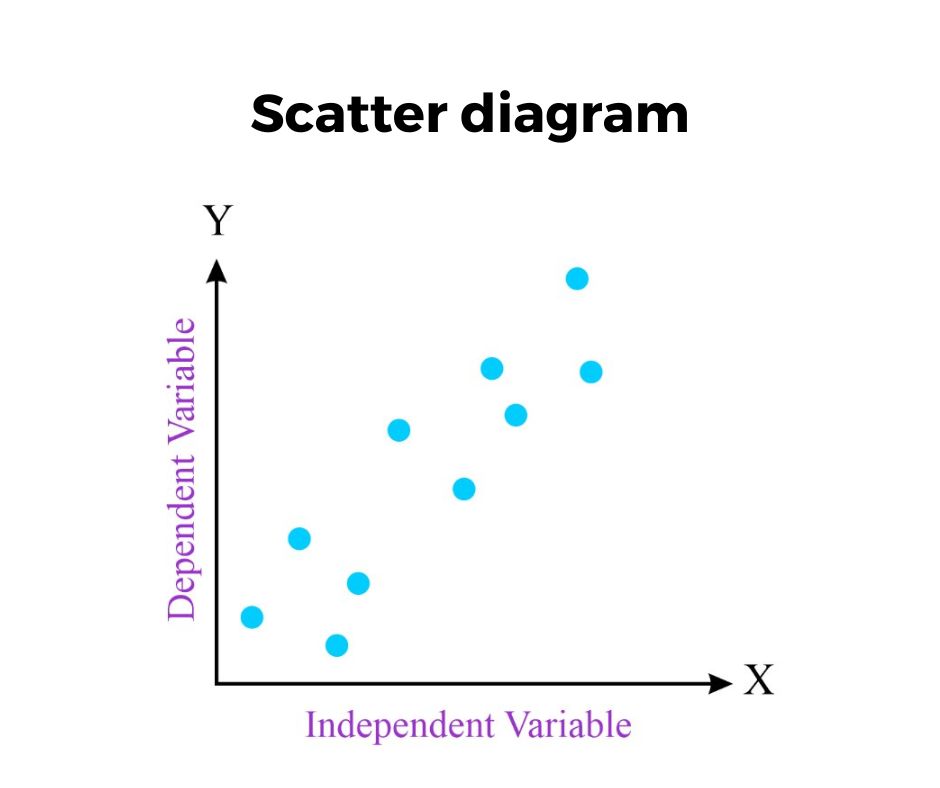
A Scatter diagram is also a powerful tool used in the improve phase of the Six Sigma project to show the relationship between two variables. It basically shows how two variables are related to each other i.e. negatively related, positively related, or not related to each other.
In RCA, it helps to show the relationship between the problem and cause and visually display whether it is a positive relation, negative relation, or no relation. This helps the team to identify which cause has the highest impact on the problem and on which cause preventive action should be taken first.
4. Fishbone diagram –
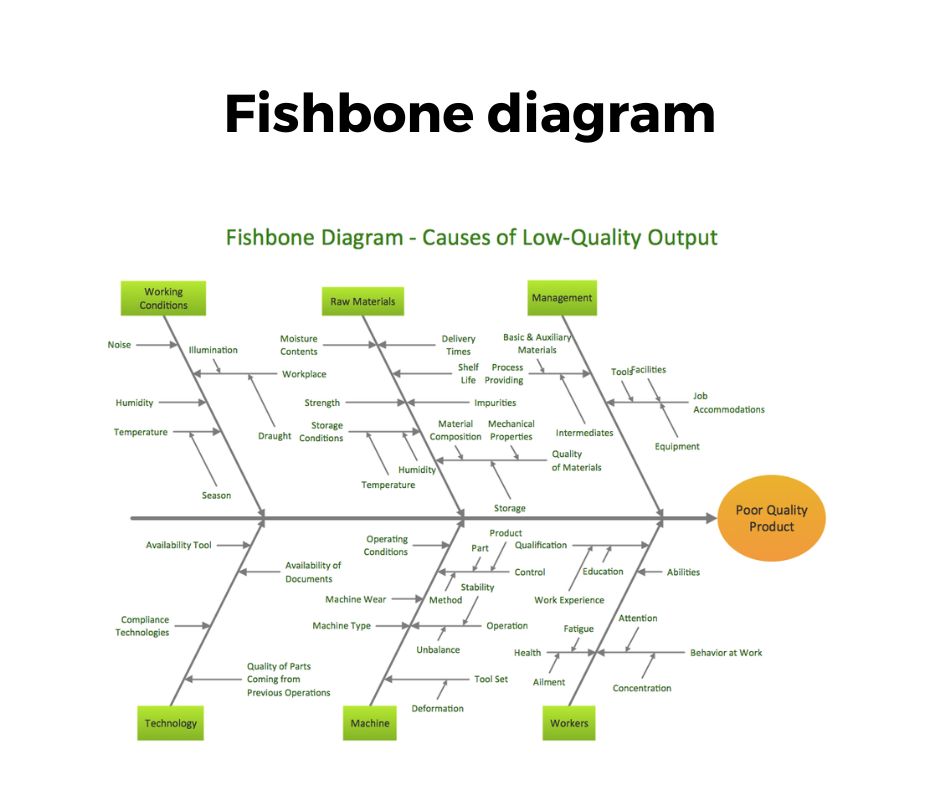
The Fishbone diagram is another effective problem-solving tool used for root causes analysis to identify all the potential causes of the problem and distribute those causes in the major categories of causes.
It also prioritizes the causes as per their impact on the problem and after use of this tool, you can use 5 why analysis to dig deeper into the identification of root causes. It is also called a cause and effect diagram or Ishikawa diagram.
In the six sigma project, this tool is used to show the cause-and-effect relationships between the problem and its causes. Want to learn in detail about this tool then check out – how the fishbone diagram is useful to identify the root causes of problems.
5. Fault tree analysis (FTA) –
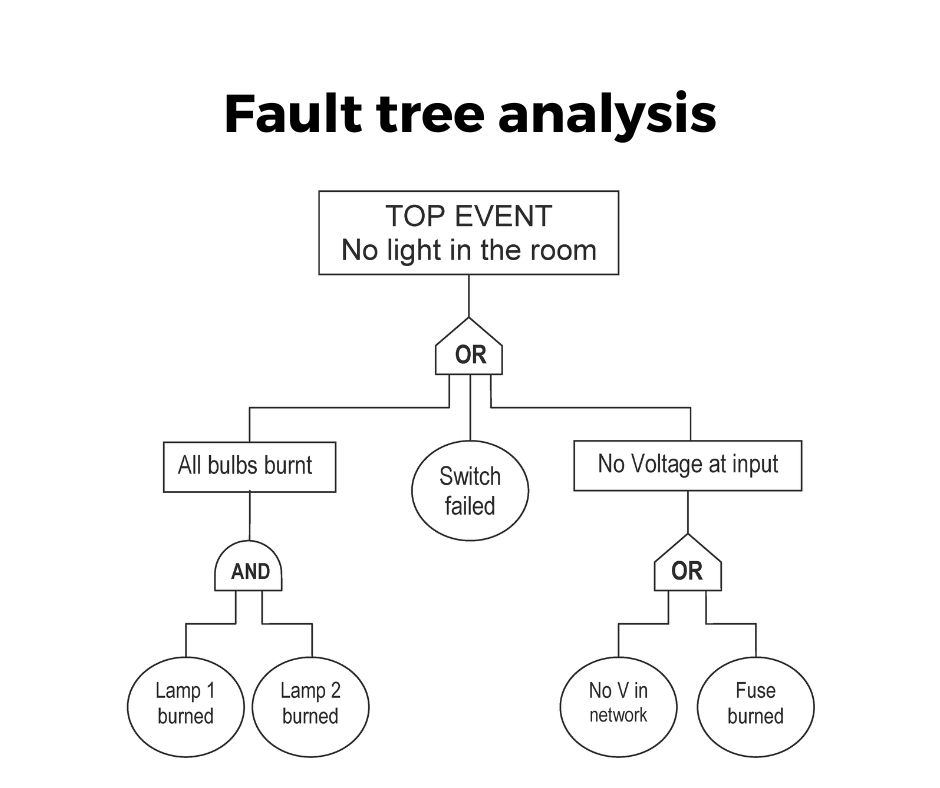
Fault tree analysis is again one of the most useful tools for root cause analysis and it is also used in Six Sigma projects for the investigation of a failure event. It is the top-down approach that identifies the component-level failure that causes the system-level failure to occur.
FTA starts with a failure event at the top and all possible causes of failure are placed below, you can see that in the below diagram. It also helps in identifying the causes which have the highest impact on the problem, so that the project team can take preventive actions on that.
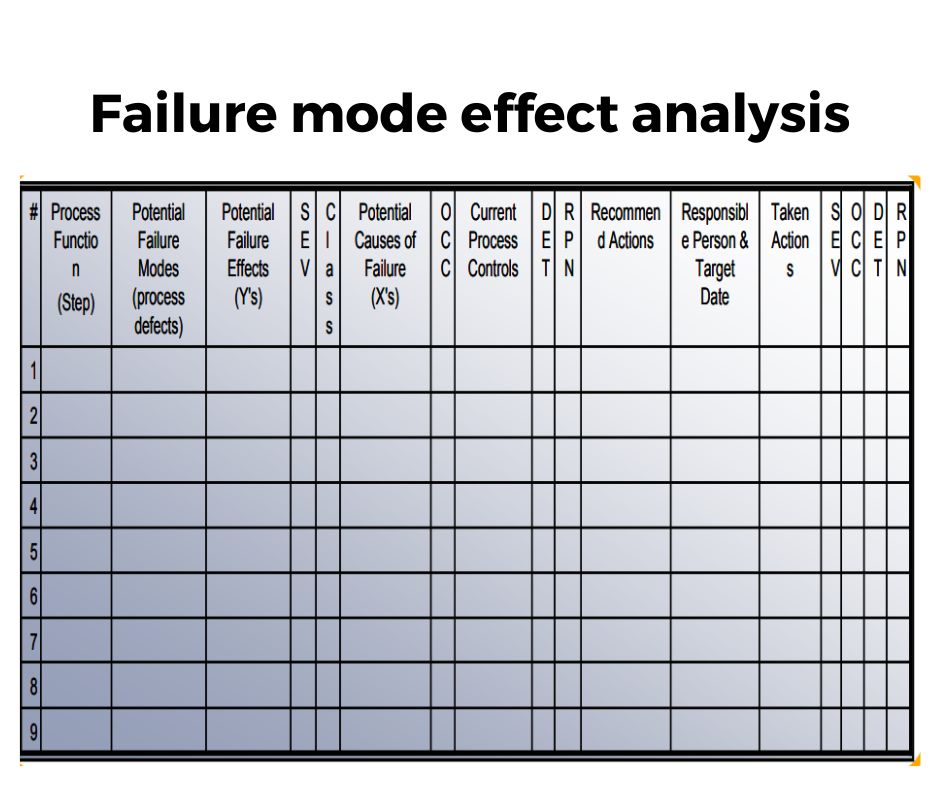
6. Failure mode effect analysis (FMEA) –
Out of these 6 tools, I can say that FMEA is the most systematic method of failure analysis because all the other tools are reactive but FMEA is a proactive tool for evaluating a process or product to identify where and how it might fail and to assess the relative impact of different types of potential failures.
It helps to identify the potential failure mode in the process before the failure event occurs. Many experts say that if you use the FMEA from the start in your process or in product design then there will be very less chance that you need to do root cause analysis in the future.
Advantages & disadvantages
Advantages –
- Root cause analysis is applicable to different areas of business for improvement like process improvement, a new process or product design, risk management, quality management, quality control, etc.
- It uses different types of tools that help the project team in framing an accurate action for dealing with similar problems or issues in the future.
- This robust problem-solving technique fixes the problems permanently and focuses on preventive action to prevent the problem from happening again.
- It ensures constant improvement in the process/product or system of the organization and process or systems runs smoothly without any disturbance.
Disadvantages –
- Root cause analysis is a time and effort-consuming process for an organization so it is not applicable in a situation where quick problem-solving is required.
- At the end of root cause analysis, you identify the potential root causes of the problem but those causes are identified based on available data and information. It is the same as the hit and trial method hence the end results may not be correct every time.
Tips for performing effective RCA
- Gather team members together to get better ideas during RCA – Performing root cause analysis with a group of team members who are working close to the respective process or product can help you generate better ideas and solutions to the problem faster.
- Perform RCA for success in the organization – Generally, you perform root cause analysis to identify the root causes of problems but you can perform RCA on a process or product which is successfully running without any issues.
- Performing RCA on a successful process will give you complete clarity on how the particular process running successfully, and what factors are responsible for the good performance of the process. These insights you can use to improve other processes or other areas of the business.
- Take notes while performing RCA – You should focus on noting down the things that you used during RCA and it gives you better results. It can be a method, procedure, or tool.
- Note down any tool, or method that works best in the last root cause analysis. These notes will help you guide in the future to solve the same type of problem using previously used tools and methods.
Conclusion
Root cause analysis is a useful process of understanding and solving any type of complex problem. The best thing about this tool is it permanently fixes the problem and ensures that organizational processes and systems run smoothly without any interruptions.
In this article, I discussed the root cause analysis in detail like fundamental concepts, how to perform it step by step, the RCA example, the list of powerful tools used for RCA, and lastly the advantages and disadvantages of this tool.
Hope you got the complete idea of this powerful problem-solving tool. If you found this article useful then please share it in your network and subscribe to get more such articles every week.


Pingback: 5 Whys Analysis Example: Identify Root Causes of Problems
Pingback: Pareto Chart: How you can identify significant causes of problem?
Pingback: Kaizen Tools: 5 Tools You Must Know for Continuous Improvement
Pingback: What is COPQ (Cost of Poor Quality)? Complete Guide for 2024
Pingback: Gemba Walk: How To Do it in 8 Steps and Achieve Great Results?
Pingback: DMAIC vs DMADV: Which Methodology Is Right For You?
Pingback: Scatter Diagram: How To Utilize It For Data Analysis?
Pingback: How 5W2H Method Can Be Used for Problem Solving?